
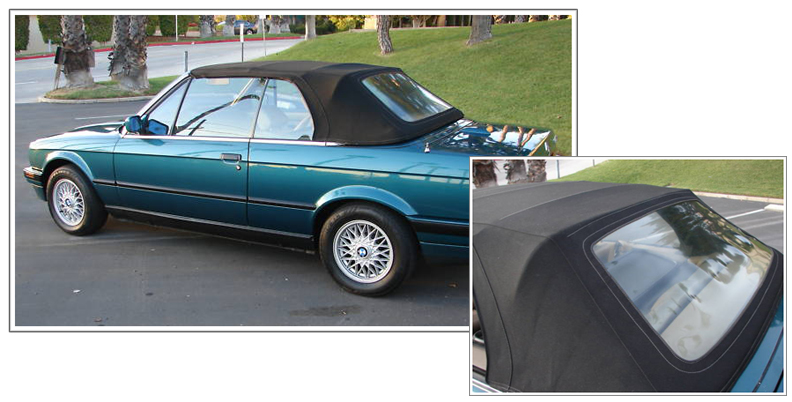
If you are a proud owner of a 1989 BMW 325i Convertible, you know that its sleek design and performance are second to none. However, over time, the convertible top may start to show signs of wear and tear. Whether it’s due to harsh weather conditions or simply the natural aging process, replacing the convertible top can bring new life to your beloved BMW. In this guide, we will take you through the step-by-step process of replacing the convertible top, ensuring that you can enjoy open-air driving once again.
Replacing the convertible top may seem like a daunting task, but with the right tools and knowledge, it can be a rewarding DIY project. This guide will provide you with detailed instructions, accompanied by clear images, making the process easy to follow. You won’t need to spend a fortune at a professional repair shop – by following our guide, you can save both time and money.
Before starting the replacement process, it’s important to gather all the necessary materials. This includes a new convertible top specifically designed for your 1989 BMW 325i Convertible, as well as tools such as a trim stick, staple gun, and screwdrivers. It’s also advisable to have a friend or family member assist you during certain steps to ensure a smooth and efficient installation process.
With the right mindset, tools, and materials, you can give your 1989 BMW 325i Convertible a fresh and stylish look with a new convertible top. By following our comprehensive guide, you will be able to replace the convertible top with ease, allowing you to enjoy the open road in style. So why wait? Let’s get started on this exciting project and revitalize your BMW today!
Why Replace Your 1989 BMW 325i Convertible Top?
If you own a 1989 BMW 325i convertible, you know how enjoyable it is to cruise around with the top down, feeling the wind in your hair and the sun on your face. However, over time, the convertible top can become worn, damaged, or faded, detracting from the overall appearance and functionality of your car. That’s why it’s important to consider replacing your convertible top.
Replacing your 1989 BMW 325i convertible top offers several benefits. Firstly, a new top will revitalize the look of your car, instantly making it appear more stylish and well-maintained. A worn or damaged top can make even the most pristine vehicle look tired and neglected, so installing a new one will give your BMW a fresh and rejuvenated appearance.
Secondly, a new convertible top will provide improved protection against the elements. Over time, the original top can become less effective at keeping out rain, wind, and debris. By replacing the top, you’ll ensure that your car stays dry and comfortable, even in inclement weather conditions. Additionally, a new top will also provide better insulation, helping to regulate the temperature inside the car.
Thirdly, a replacement top will restore the functionality of your convertible. If your current top is torn, leaks, or has difficulty opening and closing, it can be frustrating and inconvenient. By installing a new top, you can enjoy the ease and convenience of fully functional convertible operation.
Lastly, replacing your convertible top can increase the overall value of your 1989 BMW 325i. Whether you plan to sell your car or simply want to maintain its value, a new top will enhance its appeal to potential buyers and collectors. A well-maintained and properly replaced convertible top demonstrates that the vehicle has been cared for and suggests that other areas of the car have also been well-maintained.
In conclusion, replacing the convertible top of your 1989 BMW 325i is a wise investment that offers numerous benefits. It improves the appearance, protects against the elements, restores functionality, and enhances the value of your car. So why wait? Start looking for a high-quality replacement top and enjoy the pleasure of driving with the top down once again!
Tools and Equipment Needed
Before you begin replacing the convertible top on your 1989 BMW 325i, you will need the following tools and equipment:
1. Metric Socket Set
A metric socket set will be essential for removing and replacing various bolts and screws on the convertible top.
2. Torx Driver Set
A set of torx drivers will be necessary for removing and installing torx screws that hold the convertible top in place.
3. Phillips Screwdriver
A Phillips screwdriver will be needed for undoing and tightening screws during the replacement process.
4. Pliers
Pliers will be useful for grasping and manipulating small parts or wires.
5. Razor Blade
A razor blade will be necessary for cutting and removing the old convertible top fabric.
6. Staple Gun
A staple gun will be required for attaching the new convertible top fabric to the frame.
7. Fabric Adhesive
Fabric adhesive will be needed to secure any loose or frayed edges of the new convertible top fabric.
8. Protective Gloves
It is recommended to wear protective gloves to avoid any cuts or injuries while working with tools and sharp materials.
9. Safety Glasses
Wearing safety glasses is advised to protect your eyes from any debris or flying particles during the replacement process.
| Tool/Equipment | Description |
|---|---|
| Metric Socket Set | Used for removing and replacing bolts and screws |
| Torx Driver Set | Required for removing and installing torx screws |
| Phillips Screwdriver | Used for undoing and tightening screws |
| Pliers | For grasping and manipulating small parts or wires |
| Razor Blade | Necessary for cutting and removing old fabric |
| Staple Gun | Required for attaching new fabric to frame |
| Fabric Adhesive | Used to secure loose or frayed edges of fabric |
| Protective Gloves | Recommended for hand protection |
| Safety Glasses | Wear to protect eyes from debris |
Removing the Old Convertible Top
Before you can begin replacing the convertible top on your 1989 BMW 325i, you’ll need to remove the old one. Follow the steps below to successfully remove the old convertible top:
- Start by lowering the convertible top half way.
- Use a flathead screwdriver to gently pry off the plastic caps on the ends of the tension straps.
- Once the plastic caps are removed, use pliers to unhook the tension straps from the convertible top frame.
- Next, remove the screws or bolts that secure the convertible top to the frame. These can usually be found along the edges and the rear of the frame.
- After the screws or bolts are removed, carefully lift the old convertible top off of the frame.
- Take note of how the old convertible top was attached to the frame, as this will help guide you during the installation of the new top.
- Inspect the frame for any damage or signs of wear that may need to be repaired before installing the new convertible top.
- Once the old convertible top is removed and the frame is inspected, you’re ready to move on to installing the new convertible top.
Removing the old convertible top requires patience and attention to detail. Take your time to ensure that all components are properly disconnected and removed, as this will make the installation of the new top much easier.
Preparing the New Convertible Top
Before installing the new convertible top on your 1989 BMW 325i, it is important to prepare it properly to ensure a smooth and seamless installation. Follow these steps to prepare the new convertible top:
Step 1: Lay Out the Convertible Top
Begin by laying out the new convertible top on a clean and flat surface. Ensure that there are no wrinkles or creases in the fabric. Smooth out any folds or ripples, as they may affect the final fit and appearance of the top.
Step 2: Inspect for Damages
Carefully inspect the new convertible top for any damages or defects. Check for any torn or frayed areas, loose stitching, or other imperfections. It is important to identify any issues before installation to avoid further complications during the process.
Step 3: Gather the Necessary Tools
Before starting the installation, gather all the necessary tools and hardware required for the job. This may include things like a staple gun, screwdrivers, pliers, and other tools specified in the convertible top replacement guide for your BMW 325i.
Step 4: Review the Installation Guide
Refer to the convertible top replacement guide for your specific BMW 325i model to familiarize yourself with the installation process. Pay close attention to any specific instructions or precautions mentioned in the guide.
By following these steps, you will ensure that the new convertible top is properly prepared for installation and minimize any potential issues or complications that may arise during the process. Taking the time to prepare the new top will result in a professional-looking and long-lasting replacement.
Installing the New Convertible Top
Once you have removed the old convertible top, it’s time to install the new one. Follow these steps to successfully replace the convertible top on your 1989 BMW 325i:
1. Prepare the new top
Before installing the new convertible top, lay it flat on a clean, smooth surface and carefully inspect it for any defects or damages. Make sure all the necessary parts and materials are included in the package, such as the tension cables, installation hardware, and adhesive.
2. Attach the tension cables
Start by attaching the tension cables to the frame of the convertible top. Follow the specific instructions provided by the manufacturer for your particular model. Make sure the tension cables are properly aligned and securely fastened to ensure a tight and secure fit for the new top.
3. Remove the protective backing
When installing a new convertible top, it’s common for the manufacturer to apply a protective backing on the fabric to prevent any scratches or damage during transportation. Carefully remove this protective backing, making sure not to damage the material.
4. Align the new top
Position the new convertible top onto the frame, aligning the various attachment points and ensuring that it is centered and straight. Take your time to make sure the top is correctly positioned before proceeding.
5. Secure the new top
Using the installation hardware provided, secure the new top to the frame at each attachment point. Follow the manufacturer’s instructions for the correct type and placement of each fastener. Ensure that each attachment point is tightened securely to prevent any movement or gaps.
6. Apply adhesive
Some convertible tops require the use of adhesive to ensure a secure and watertight seal. If your new top requires adhesive, carefully apply it following the manufacturer’s instructions. Make sure to apply the adhesive evenly and allow sufficient time for it to dry and bond properly.
7. Test the new top
Once the new convertible top is installed and secured, test it by operating the convertible mechanism to ensure that it opens and closes smoothly and without any issues. Check for any gaps or leaks, and make any necessary adjustments if needed.
By following these steps and the specific instructions provided by the manufacturer, you can successfully install a new convertible top on your 1989 BMW 325i. Take your time, work carefully, and enjoy the satisfaction of a freshly replaced convertible top.
Adjusting and Aligning the Convertible Top
After replacing the convertible top on your 1989 BMW 325i, it’s important to ensure that it is properly aligned and adjusted for optimal performance. Here are some steps to follow:
1. Inspect the Guide Rails
Start by examining the guide rails, which are located on either side of the convertible top. These rails help guide the top as it opens and closes. Look for any signs of damage or misalignment, such as bent or broken rails. If you notice any issues, they may need to be repaired or replaced.
2. Check the Tension Cables
The tension cables play a crucial role in ensuring that the convertible top is securely in place. Inspect these cables to make sure they are intact and properly tensioned. If you notice any fraying or slack, the cables may need to be adjusted or replaced.
3. Align the Latches
The latches are responsible for securing the convertible top in the closed position. Check that the latches are properly aligned and engaging with the corresponding receivers on the windshield frame. Adjust them if necessary to ensure a secure fit.
4. Test the Operation
Once you have completed the above steps, test the operation of the convertible top. Open and close it several times to ensure that it functions smoothly and without any issues. Pay attention to any unusual noises or resistance, as these could indicate a problem.
By following these steps, you can ensure that your newly replaced convertible top is properly adjusted and aligned, allowing for optimal performance and functionality.
Reattaching the Convertible Top to the Frame
After removing the old convertible top, you can now proceed to reattach the new one to the frame. Follow these steps to ensure a secure and proper installation:
Step 1: Position the new convertible top over the frame, making sure it is aligned and centered properly. Carefully attach it to the frame using the provided clips and fasteners. Make sure all the attachment points are secure.
Step 2: Begin by attaching the front of the convertible top to the windshield frame. Use the clips and fasteners to secure it in place. Make sure it is snug and tight, without any loose areas or wrinkles.
Step 3: Move to the sides of the convertible top and attach them securely to the side frames. Check for proper alignment and tension, and make any necessary adjustments. Smooth out any wrinkles or creases as you go.
Step 4: Attach the rear of the convertible top to the rear frame. This may require a bit more effort to ensure a tight and secure fit. Make sure all the attachment points are properly secured and the top is pulled tight.
Step 5: Once all the attachment points are secure, test the functionality of the convertible top. Make sure it opens and closes smoothly without any issues. Check for any loose areas or misalignments.
Step 6: Lastly, take the time to inspect the entire convertible top installation for any imperfections or areas that may need further adjustments. Smooth out any wrinkles or creases, and make any necessary fine-tuning to ensure a flawless finish.
Note: It’s always a good idea to refer to the specific instructions provided by the manufacturer for your particular model and year of the BMW 325i convertible to ensure the best results.
Question-answer:
Can I replace the convertible top on my 1989 BMW 325i myself?
Yes, you can replace the convertible top on your 1989 BMW 325i convertible yourself. It may require some basic mechanical skills and tools, but with the right instructions and patience, it is definitely doable.
How much does it cost to replace the convertible top on a 1989 BMW 325i?
The cost of replacing the convertible top on a 1989 BMW 325i can vary depending on several factors, such as the quality of the replacement top, whether you choose to do the installation yourself or hire a professional, and the location and labor rates in your area. On average, the cost can range from $500 to $1500.
What materials do I need to replace the convertible top on my 1989 BMW 325i?
To replace the convertible top on your 1989 BMW 325i, you will need a new convertible top, a set of convertible top installation tools (including a stapler, hog ring pliers, and trim panel removal tools), a heat gun or blow dryer, a screwdriver set, a socket wrench set, a torque wrench, and some cleaning supplies. It is also recommended to have a helper to assist you during the installation process.
How long does it take to replace the convertible top on a 1989 BMW 325i?
The time it takes to replace the convertible top on a 1989 BMW 325i can vary depending on your level of experience and the availability of tools and assistance. On average, the installation process can take anywhere from 4 to 8 hours. It is important to allocate enough time and work in a well-lit and clean area to ensure a smooth and successful installation.
Are there any specific instructions or tips for replacing the convertible top on a 1989 BMW 325i?
Yes, there are some specific instructions and tips for replacing the convertible top on a 1989 BMW 325i. It is recommended to carefully read and follow the manufacturer’s instructions that come with the replacement top. Additionally, make sure to clean and inspect the frame and seals before installing the new top. Use caution when removing and installing the trim panels to avoid damaging them. It is also a good idea to have someone assist you during the process to make it easier and safer.